Let's do it together!
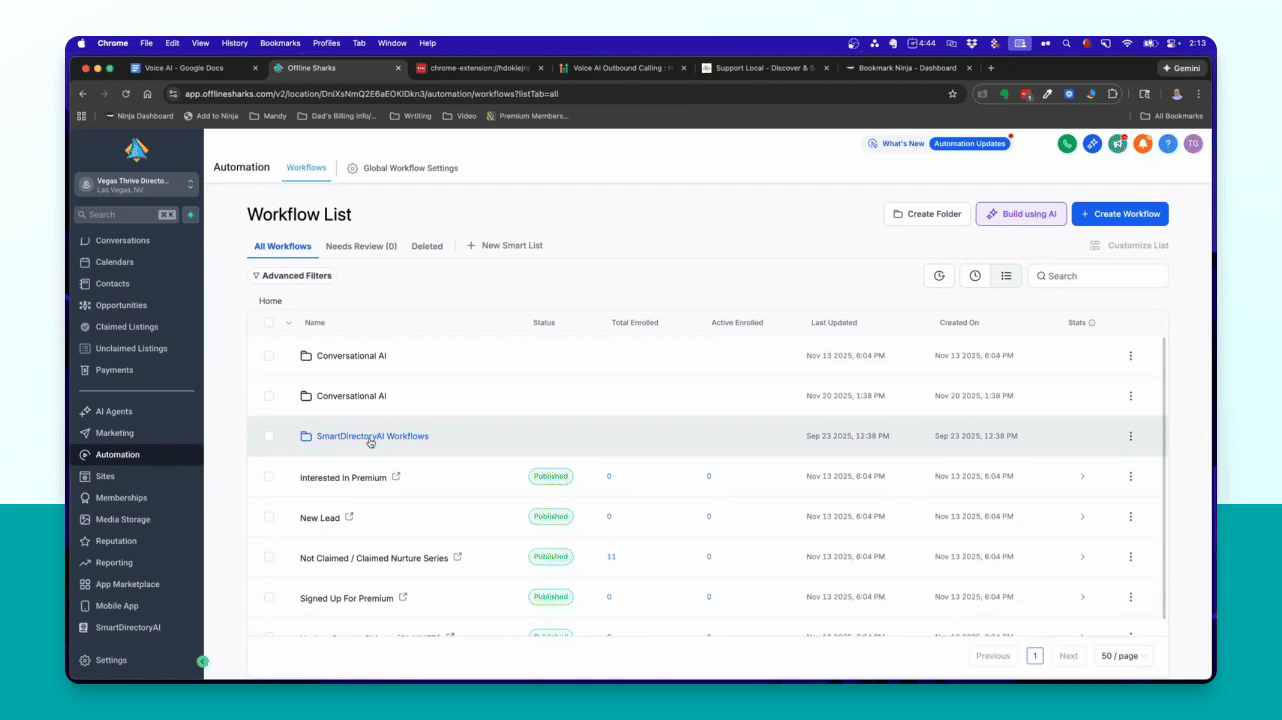
Step 1: Access Automation
Go to the left-hand menu and click on Automation.

Step 2: Open Workflow Folder
Navigate to the Smart Directory AI Workflows folder.
Step 3: Select Workflow
Find and click on the claim request approved workflow.
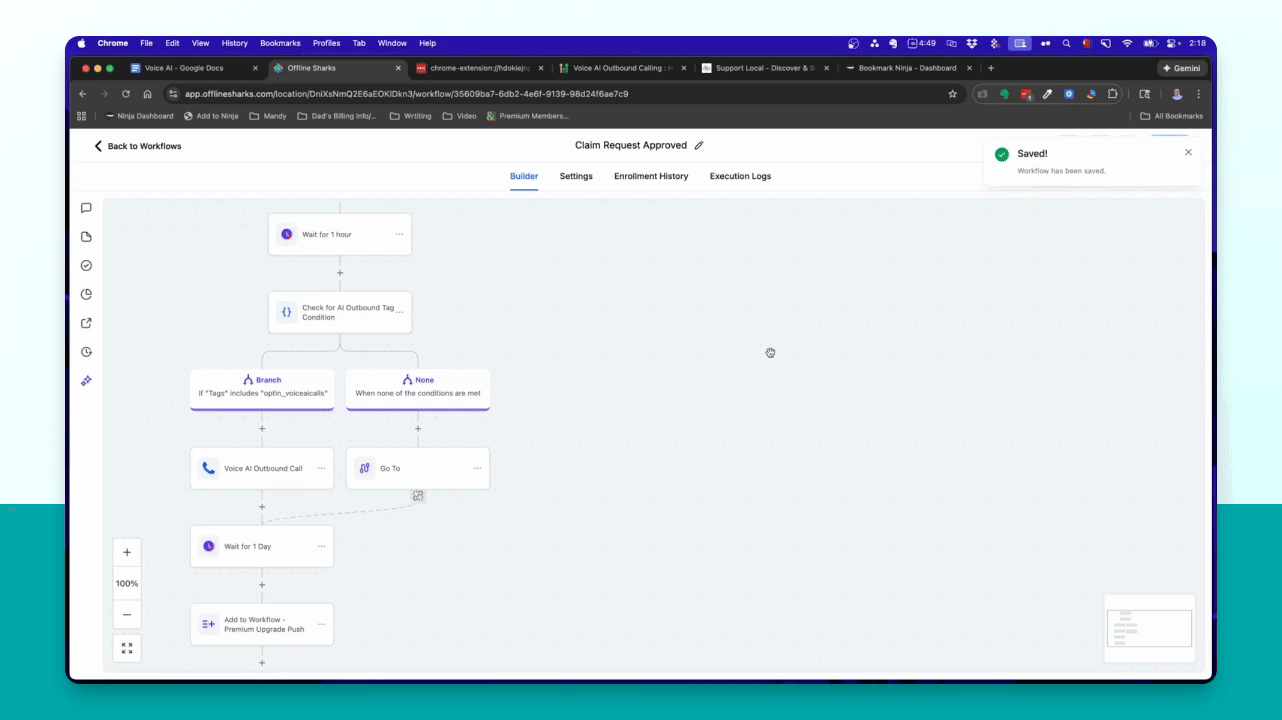
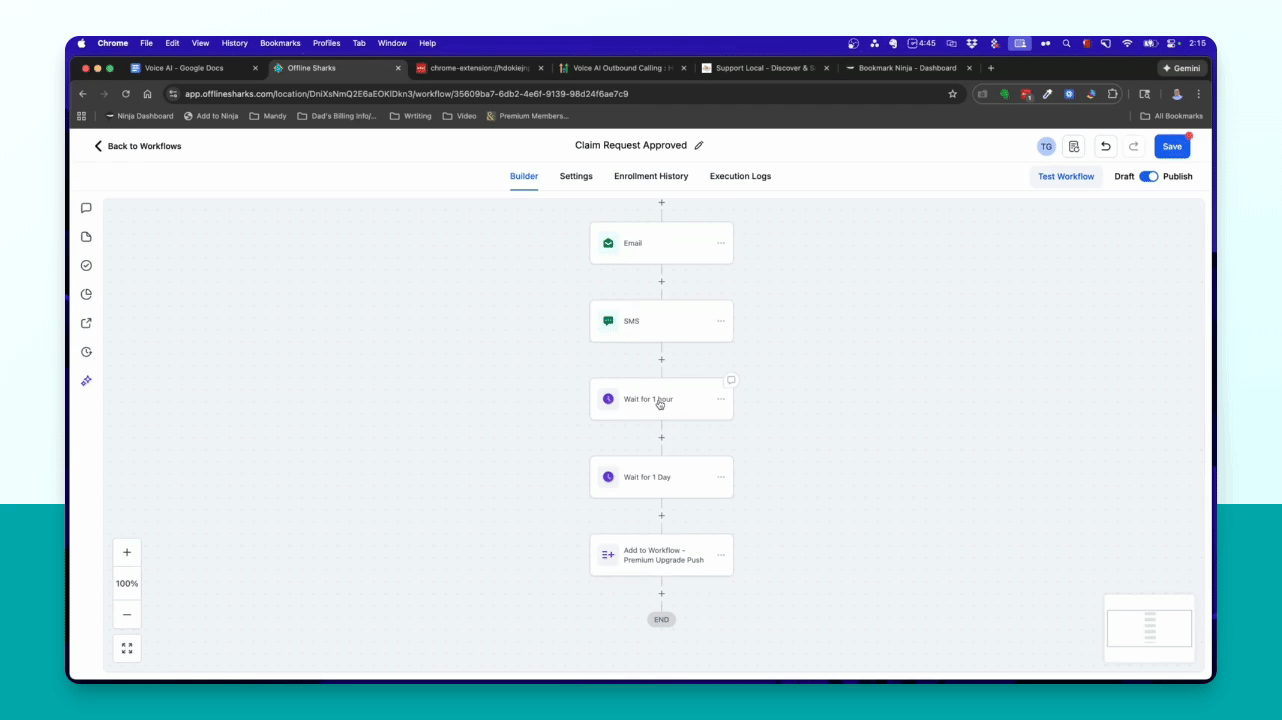
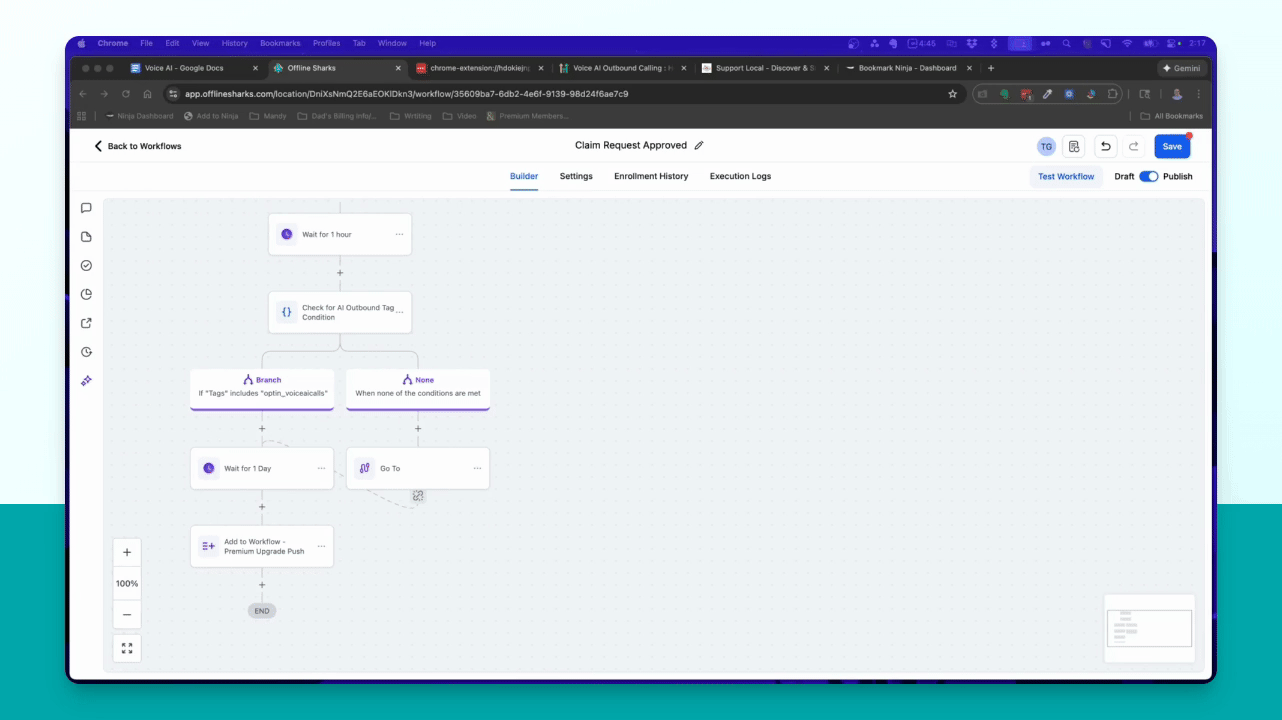
Step 4: Insert Wait Step
Click the plus sign under SMS and add a Wait action for one hour.

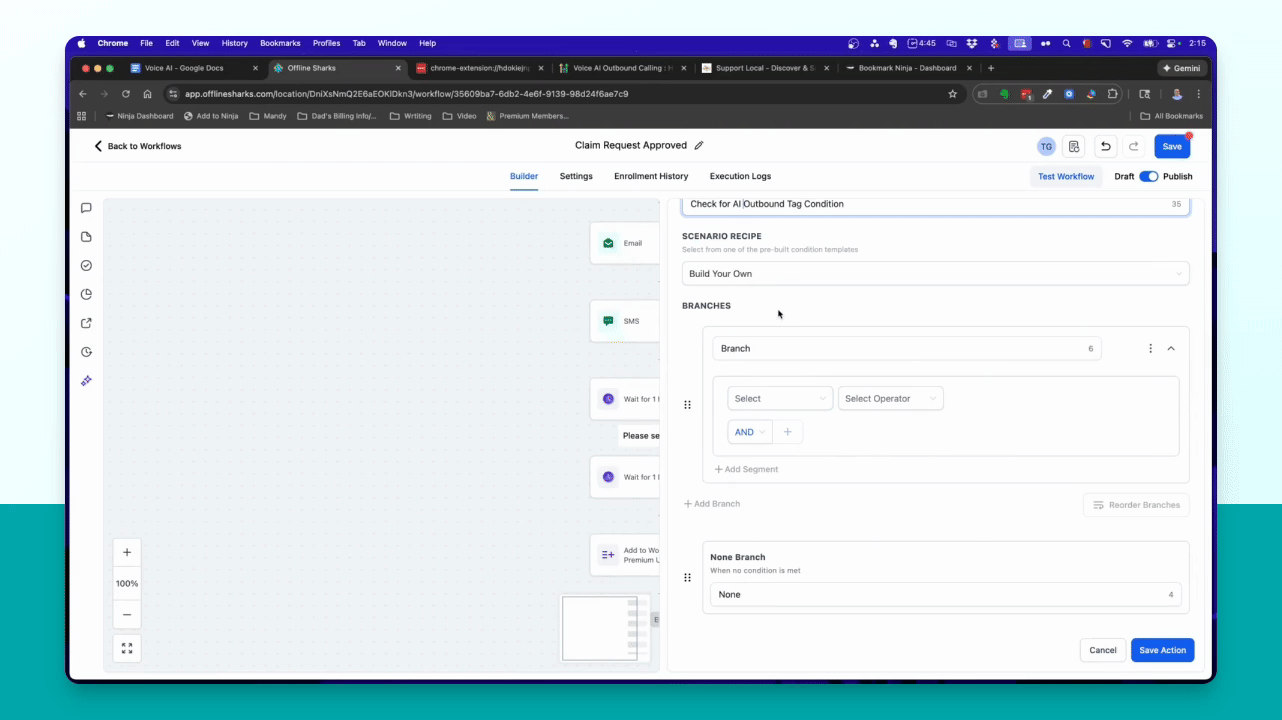
Step 5: Add Check Condition
Click the plus sign under the wait step and add an If Else condition to check for the tag.
Step 6: Define Tag Check
Set the condition to check if the contact has the opt in_voice AI calls tag.
Step 7: Create Tag if Missing
If the tag is not found, create it by typing opt in_voice AI calls and clicking Add New Tag.

Step 8: Save Condition
Save the action to finalize the tag check condition.

Step 9: Configure No Tag Action
If no tag is found, add a Go To action leading to the wait for one day step.

Step 10: Setup Outbound Call
If the tag is present, add the Voice AI outbound call action and select the agent and phone number.
Step 11: Save Workflow
Click Save to ensure all changes are saved in the workflow.

Step 12: Review Workflow
Verify that the workflow sends an email, SMS, waits an hour, and checks for the tag before proceeding.