
Step 1: Create your reCAPTCHA keys
Head here to create your reCAPTCHA:
https://www.google.com/recaptcha/admin/create
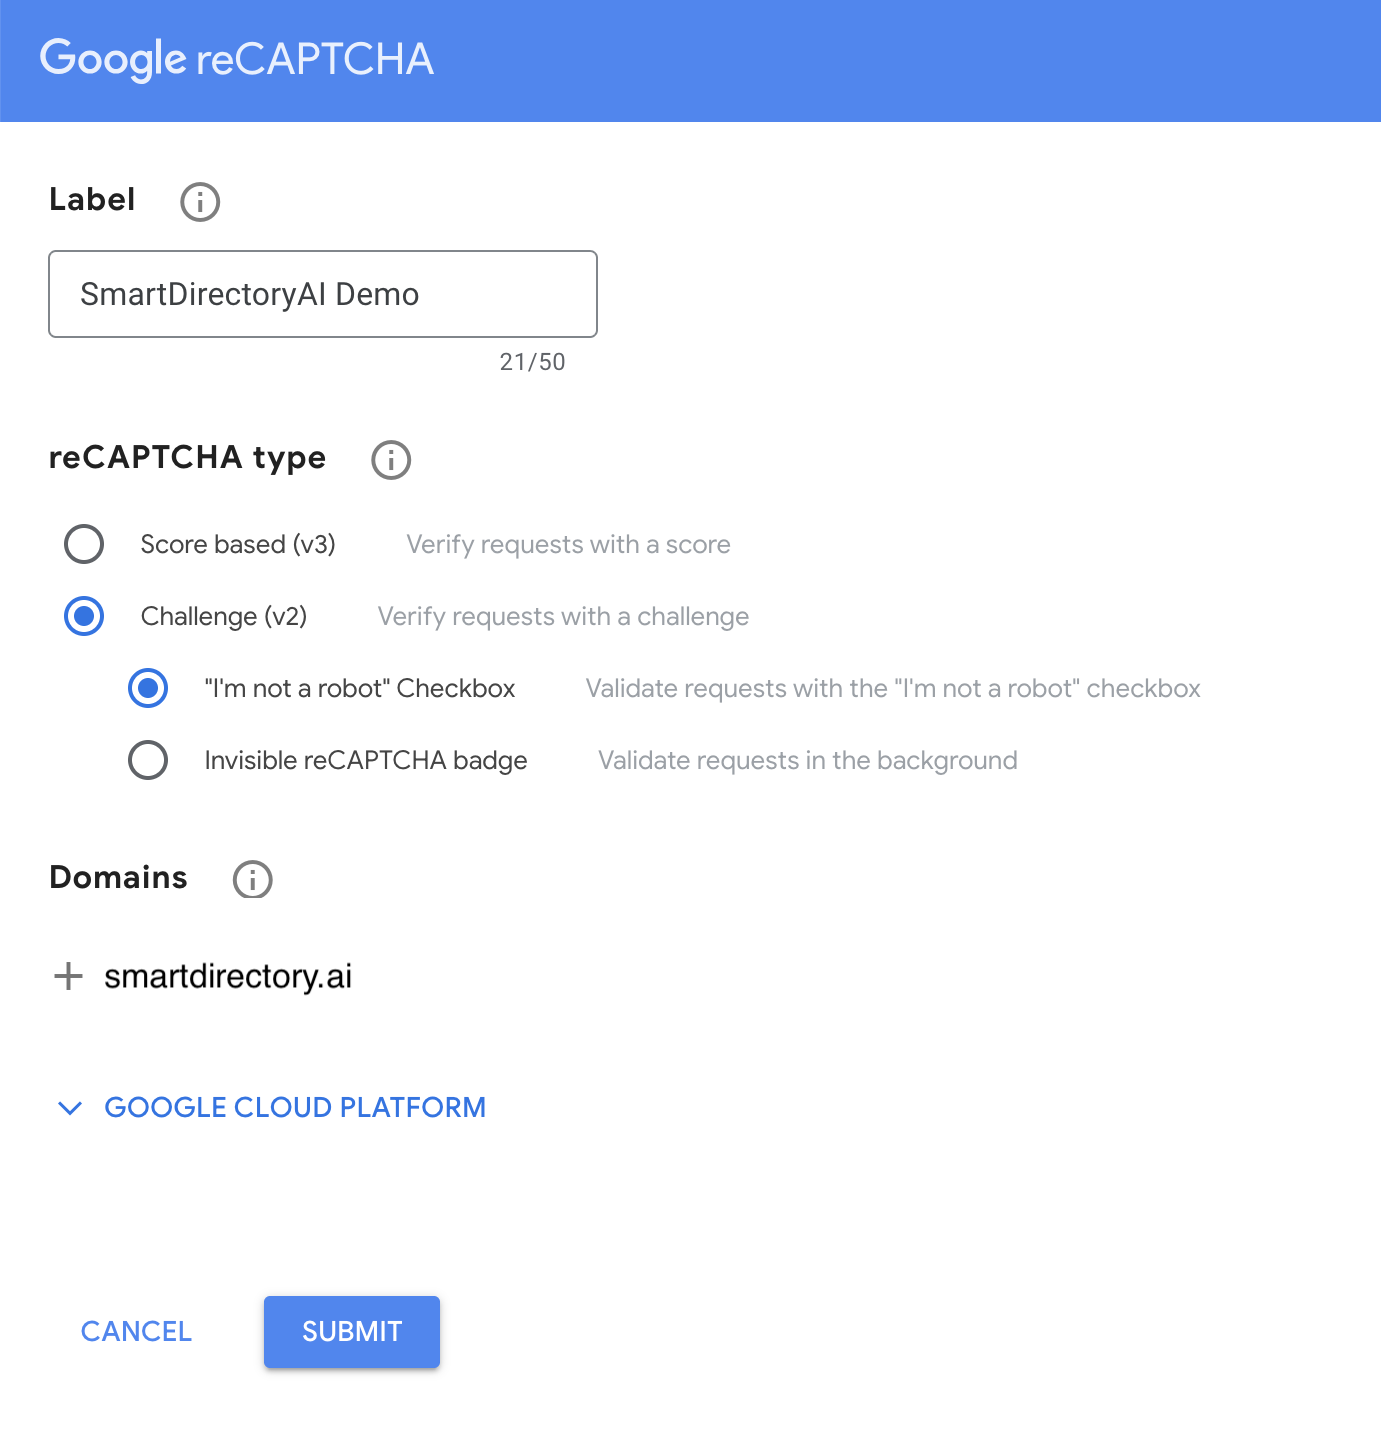
You'll see a screen that looks like the below. Here's how to fill out the form:
Label: Enter a name for the set of reCAPTCHA keys you're about to generate
reCAPTCHA type: Challenge (v2) -> "I'm not a robot" Checkbox
Domains: Add the domain of your SmartDirectoryAI site
If your SmartDirectoryAI site is on a sub-domain, you should restrict the reCAPTCHA domain to the root domain only (do not include your subdomain). For example, our demo site is at demo.smartdirectory.ai. As you can see below, we restricted the domain to smartdirectory.ai.
Step 2: Add your keys in your SmartDirectoryAI site dashboard
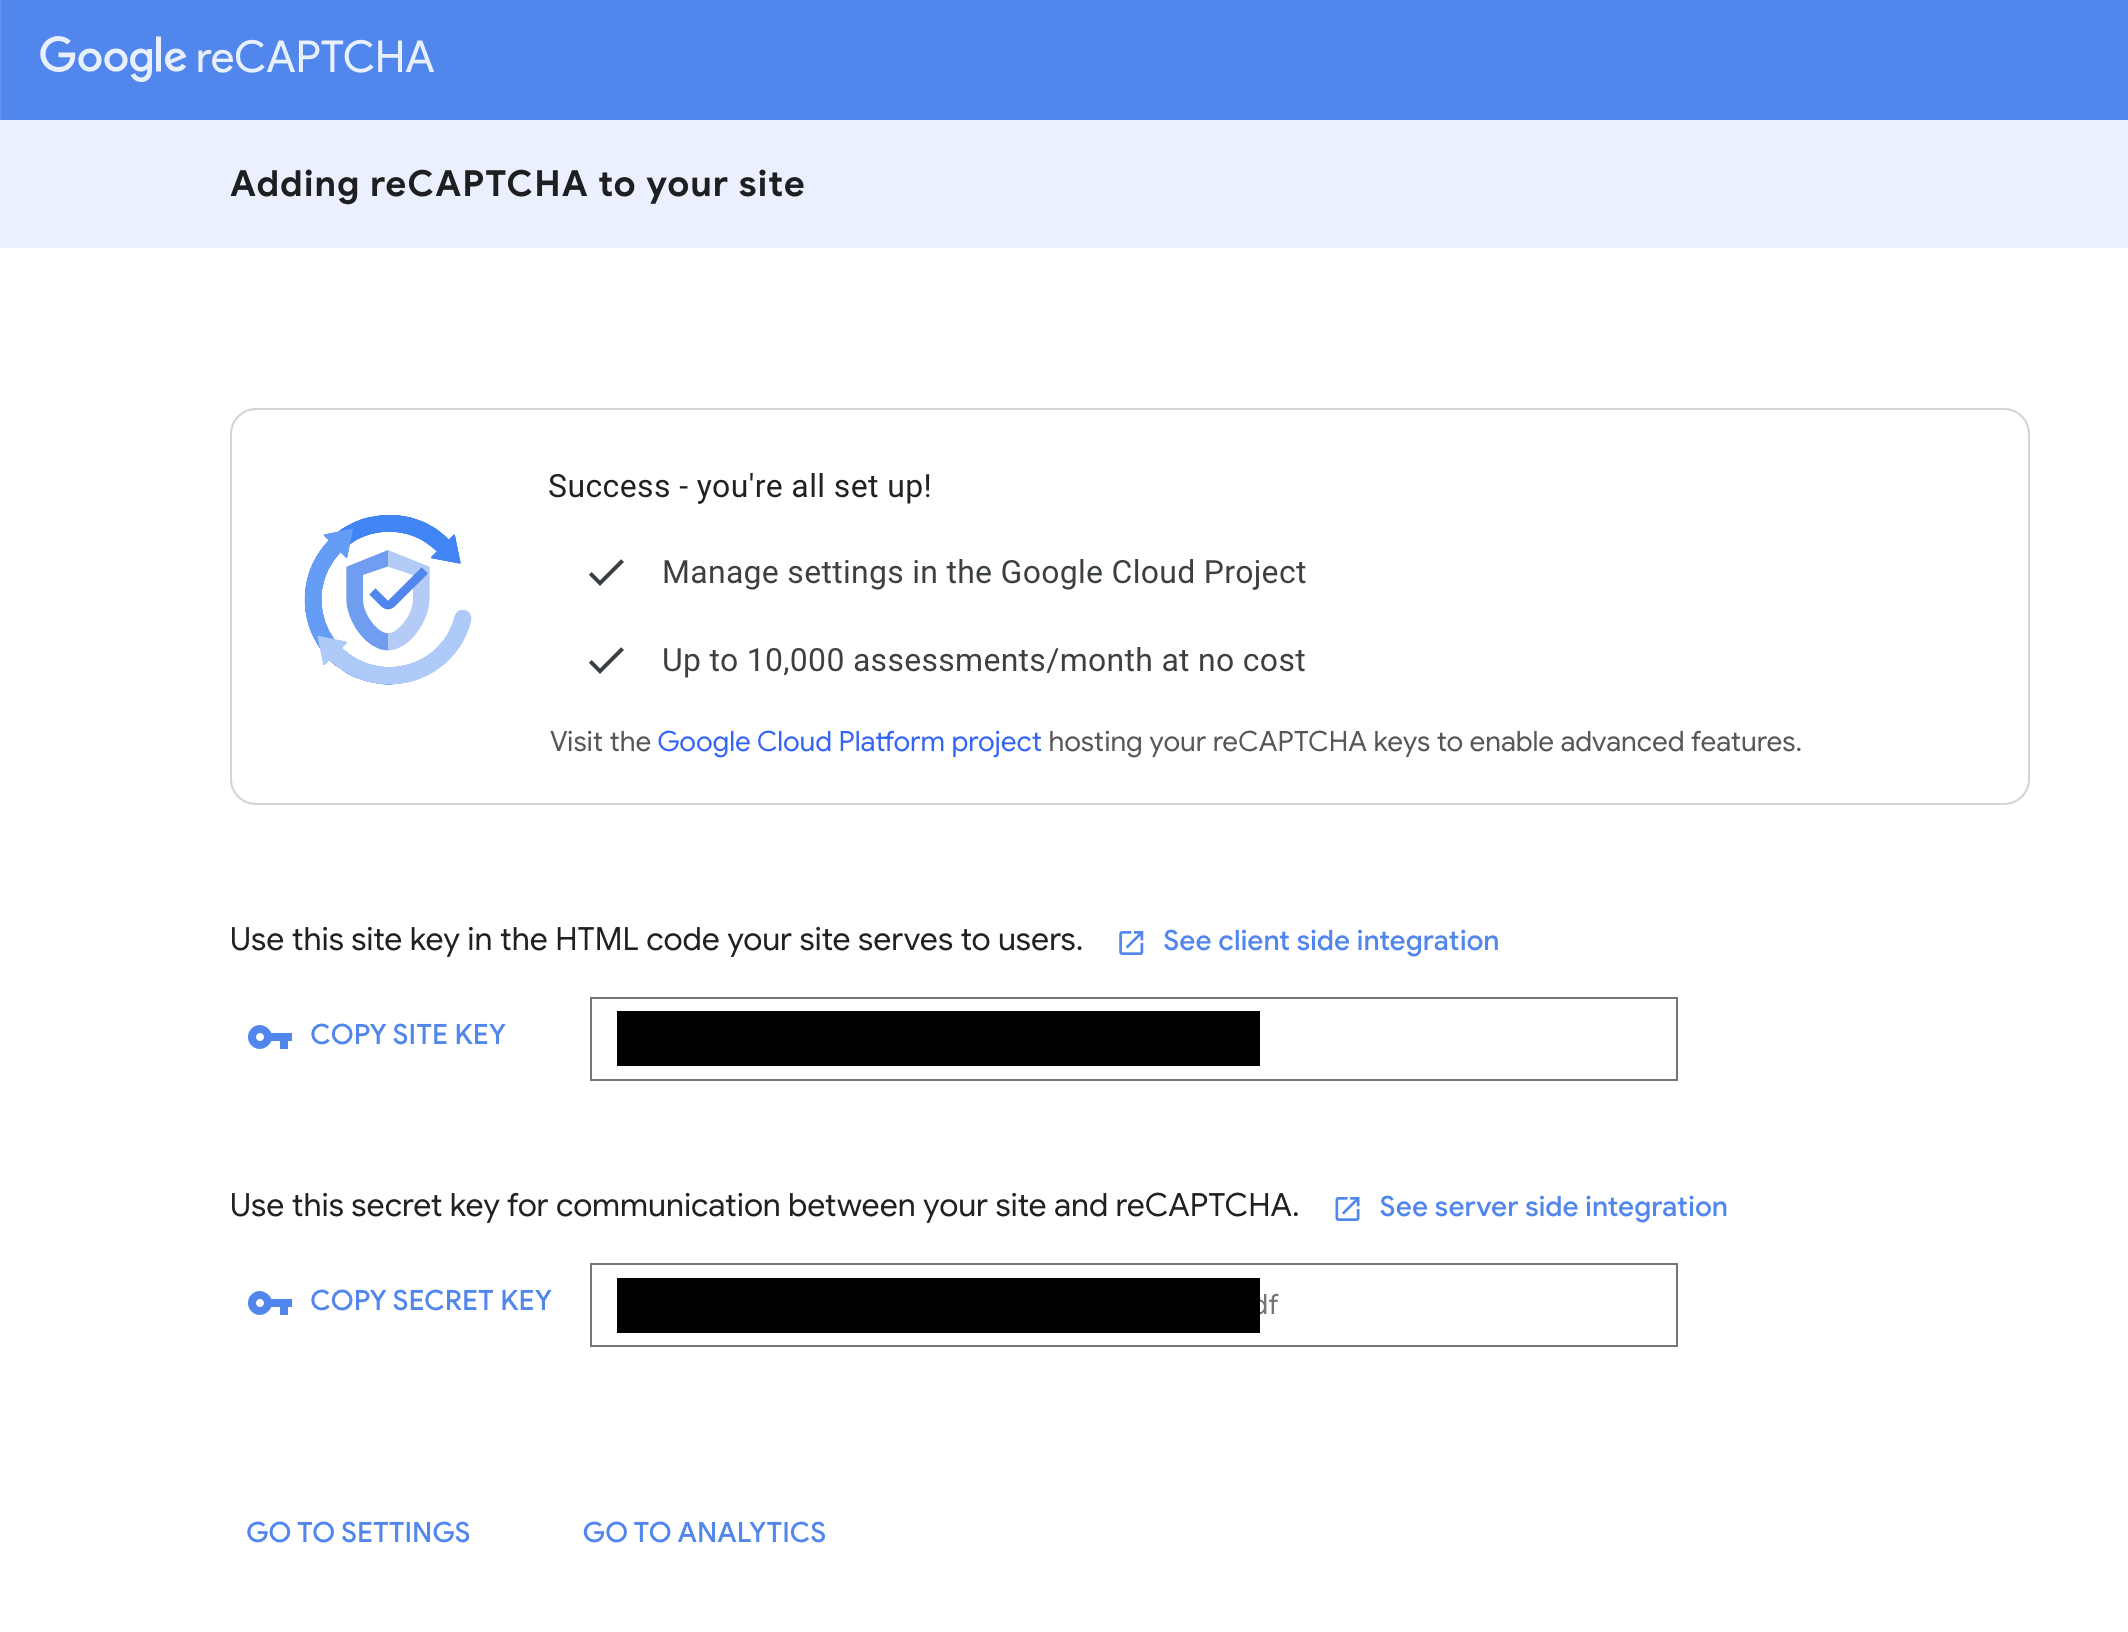
Once you submit the form above, you'll see your newly-generated keys:
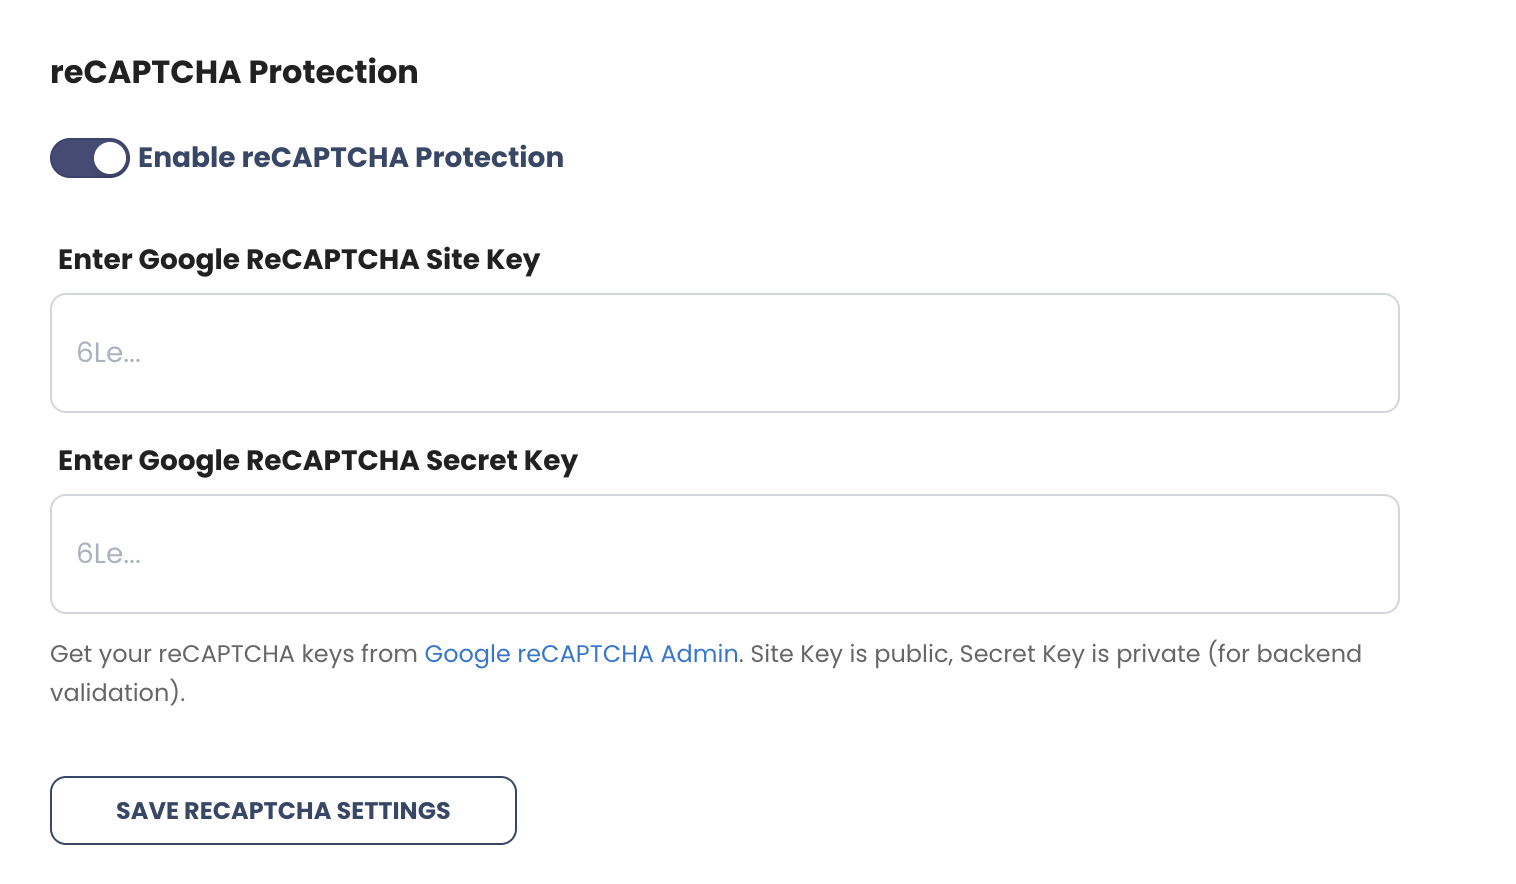
Go to your SmartDirectoryAI dashboard, then go to Settings > 2. Integrations.
Enable reCAPTCHA slider.
Enter site key in the "Site Key" box.
Enter secret key in the "Secret Key" box.
Click the "Save reCAPTCHA Settings" button.
reCAPTCHA not working?
Make sure you've selected Challenge (v2) and "I'm not a robot" Checkbox when creating your keys.