Resources
Download Email Warm-Up Response Template
Download Our "Email Warmup With SmartDirectoryAI" PDF Guide
Email Sending Guide: Email Best Practices & Email Warm Up
Let's do it together!
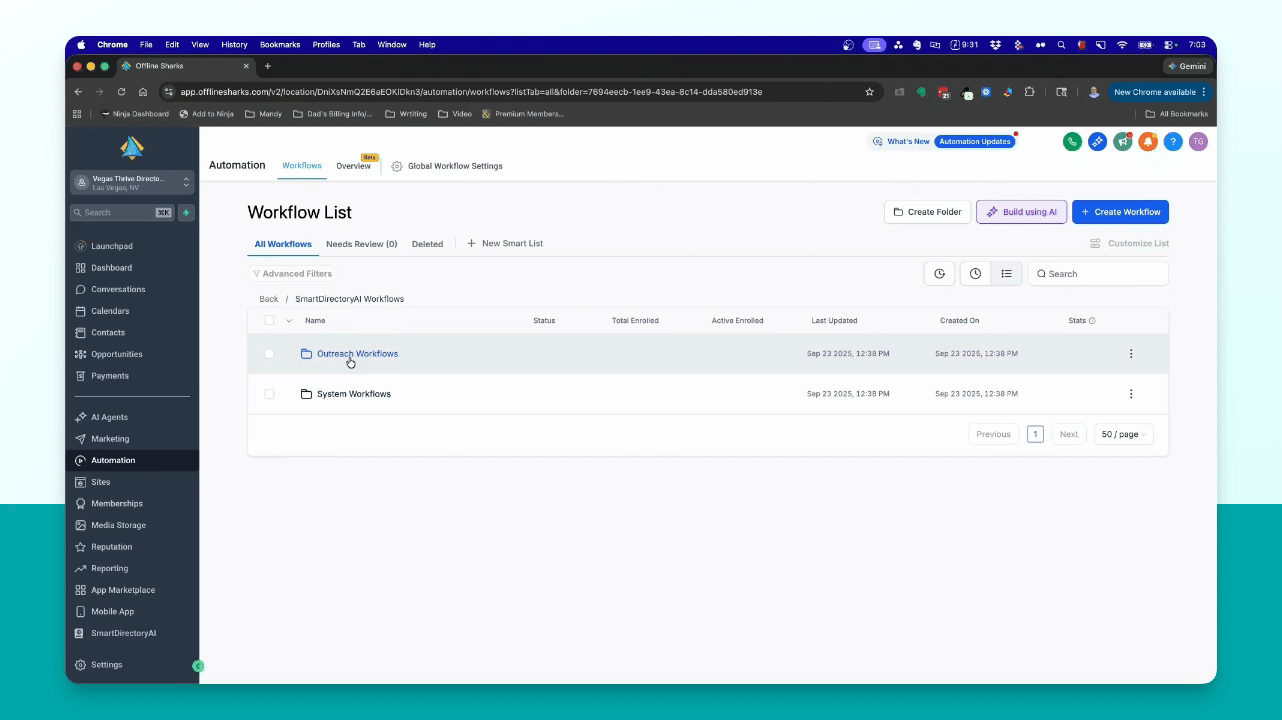
Step 1: Access Workflows
Navigate to Automation to find the Smart Directory AI Workflows folder, then the Outreach Workflows folder.
Step 2: Identify Workflow
Locate the listing outreach workflow, which is your starting point for outreach.
Step 3: Organize Contacts
Go to Contacts and prepare to add businesses to the workflow for tracking responses.
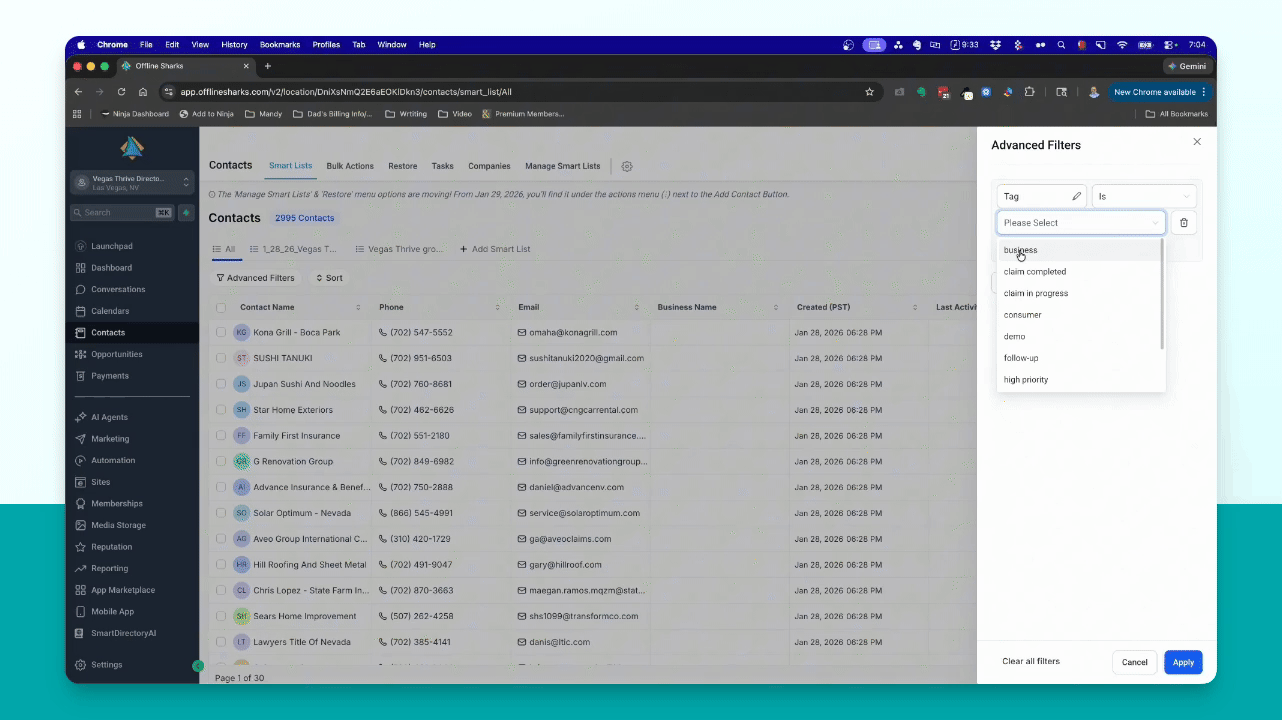
Step 4: Filter by Tag
Use Advanced Filters to filter contacts by tag. Type tag and select business.

Step 5: Apply Filter
Select the business tag and click Apply to view the filtered contacts.
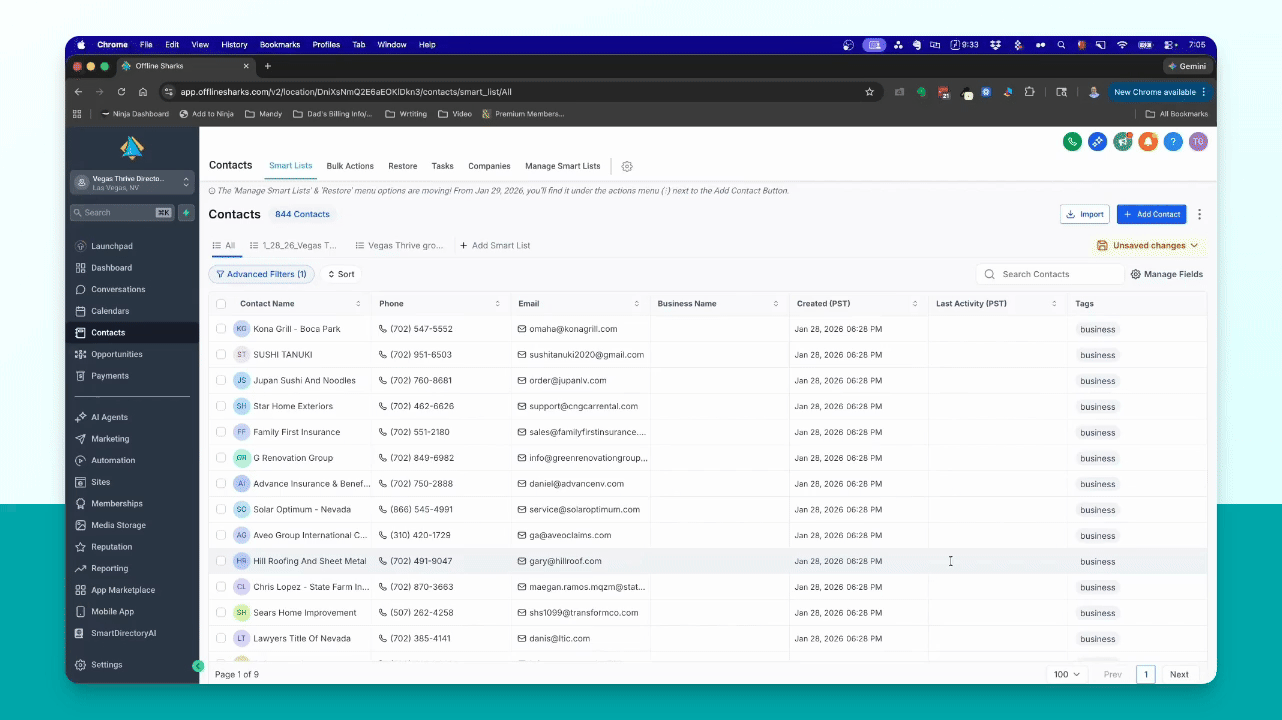
Step 6: Select Contacts
Select all contacts on the page, ensuring you choose up to 100 to manage results effectively.
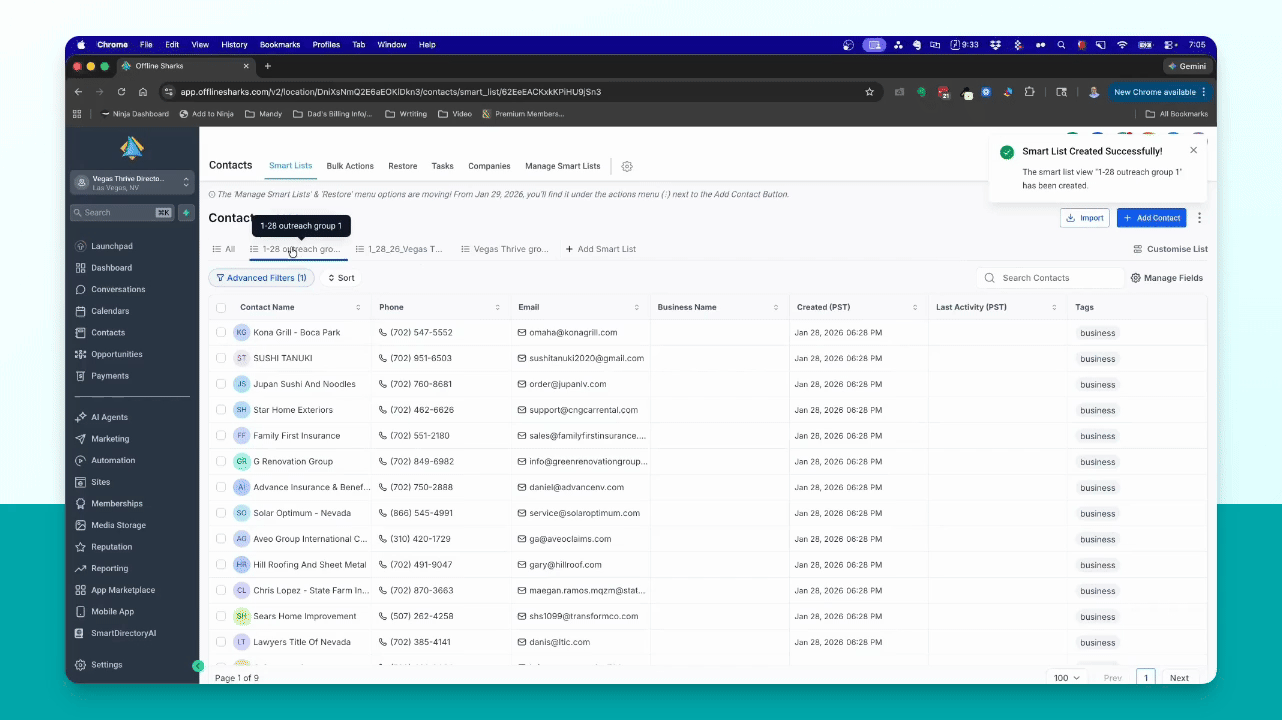
Step 7: Create Smart List
Create a Smart List for these contacts by clicking the Add Smart List button and naming it.

Step 8: Select Smart Group
Select the newly created Smart Group to view all 100 contacts you added.
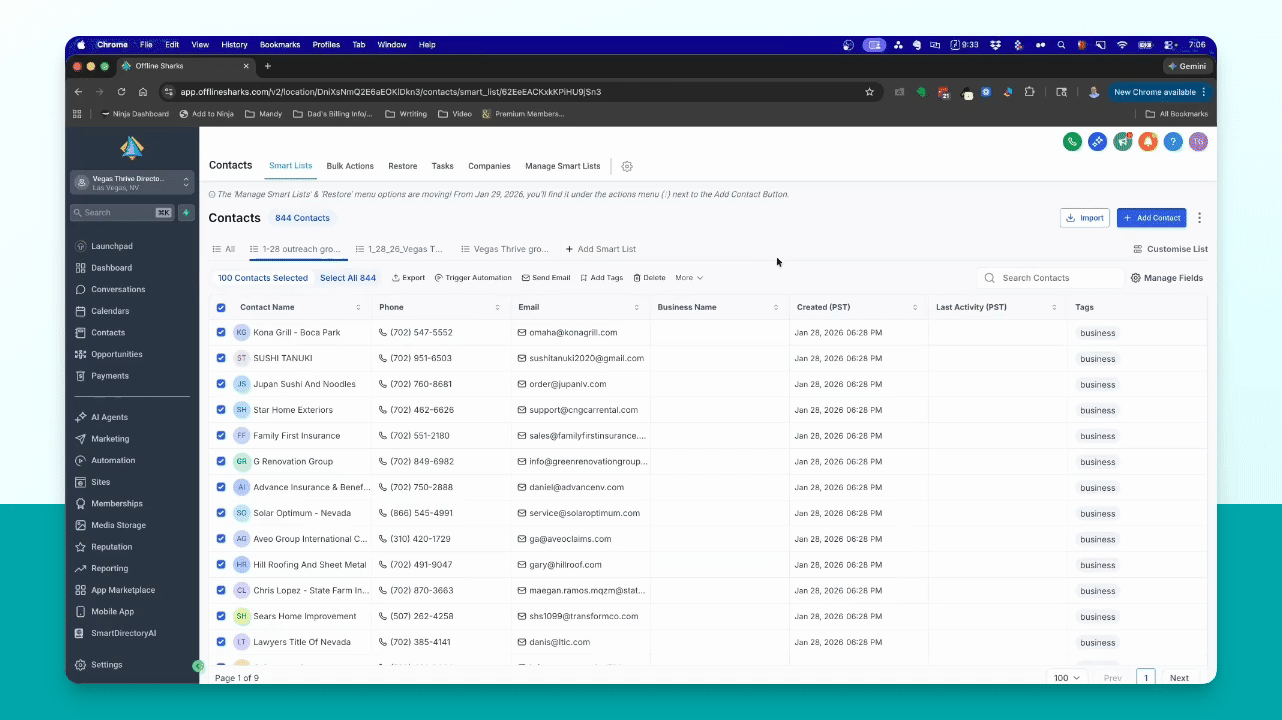
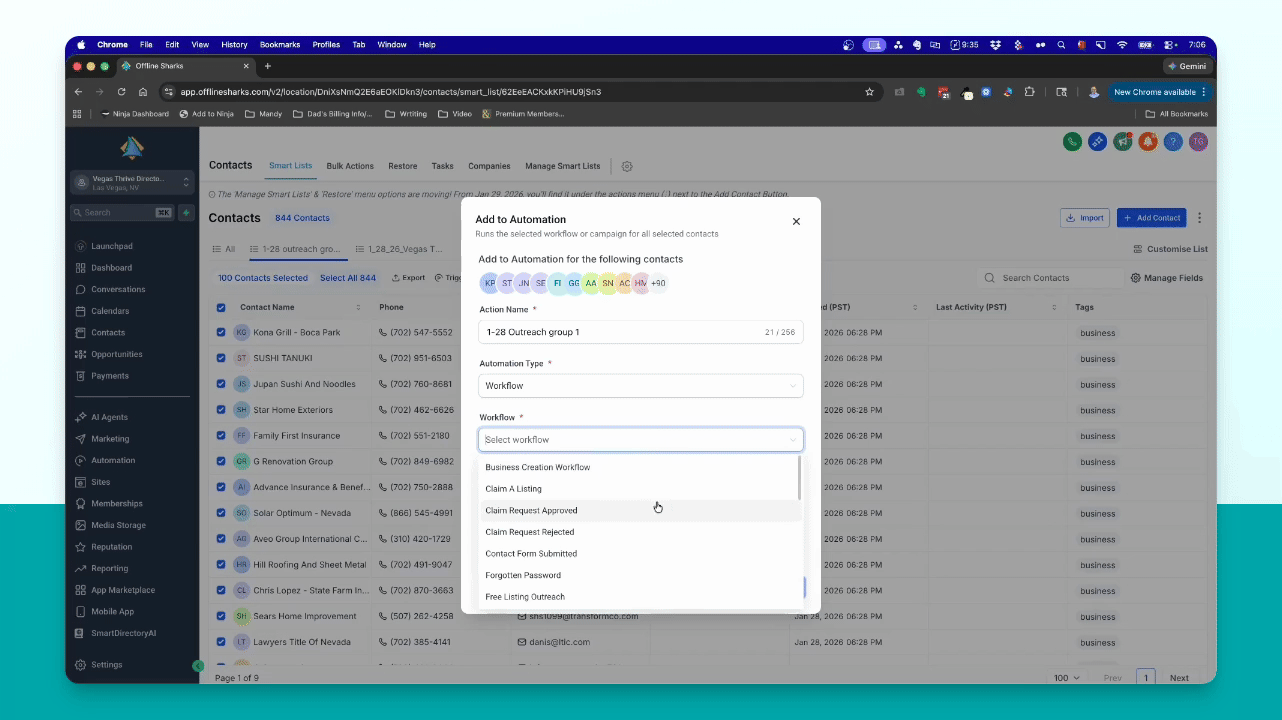
Step 9: Trigger Automation
Click Trigger Automation to start the outreach process for the selected contacts.

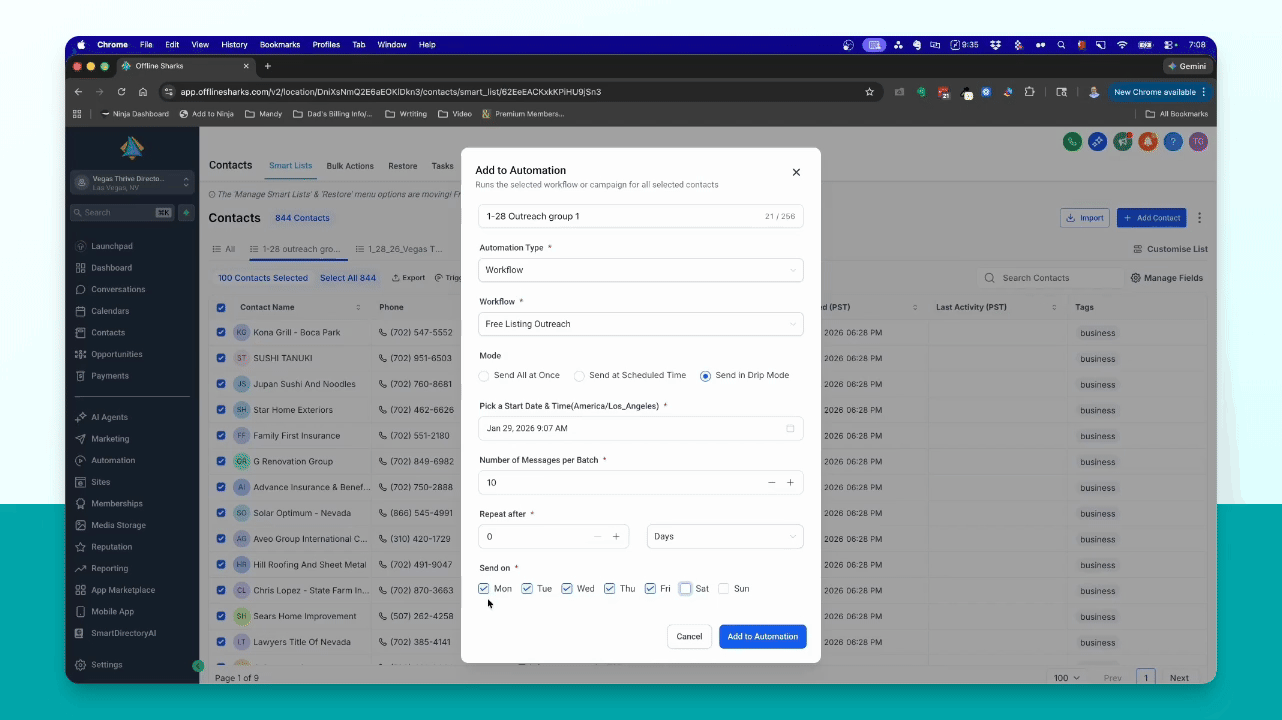
Step 10: Name the Group
Label this outreach group for easy identification, such as 128 outreach group one.
Step 11: Select Workflow
Choose the free listing outreach workflow for the automation.

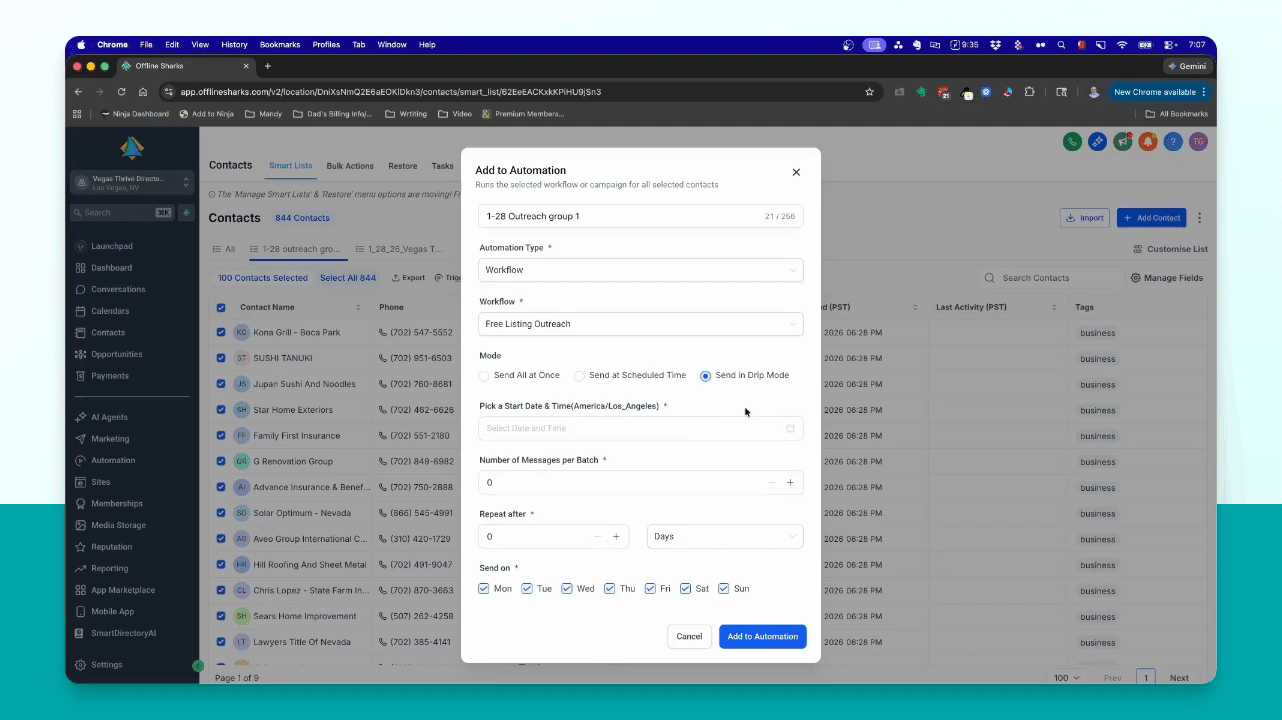
Step 12: Use Drip Mode
Select Drip mode to send messages gradually instead of all at once.
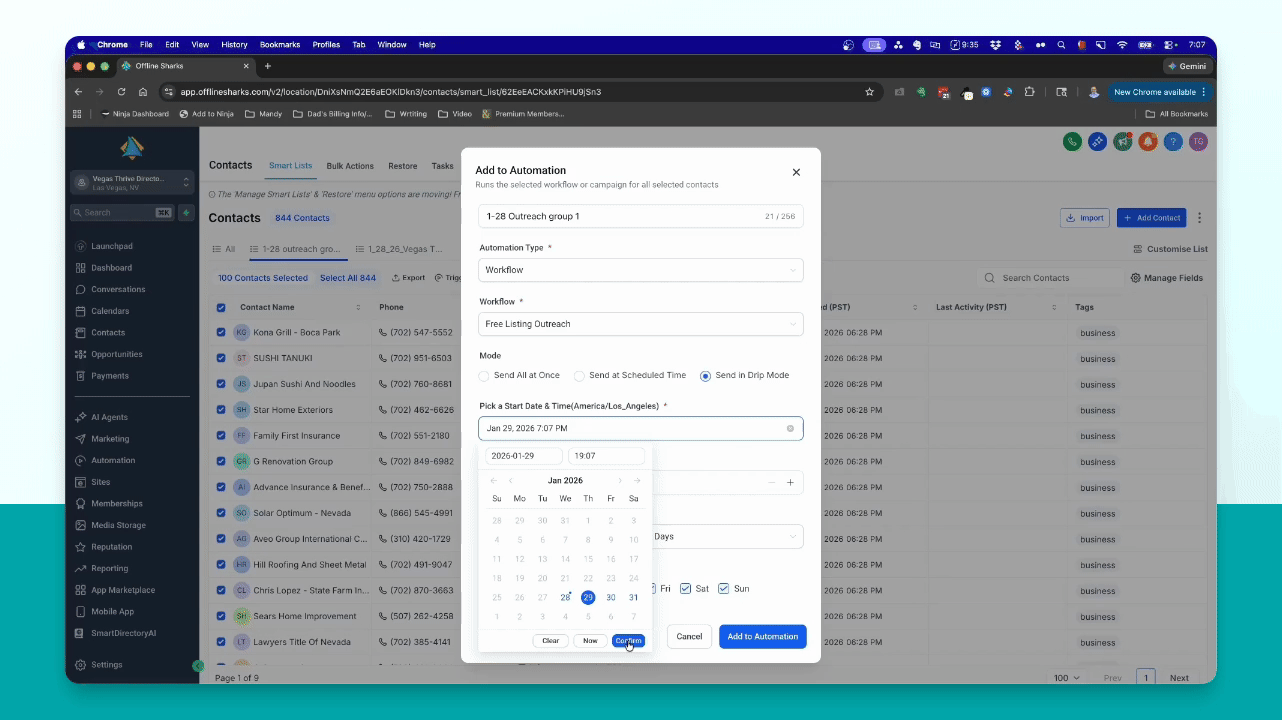
Step 13: Set Schedule
Choose a start date and time for the outreach messages, confirming your selections.
Step 14: Configure Batch Size
Set how many messages to send per batch, like 10, and confirm the settings.
Step 15: Specify Sending Days
Select which days to send messages, ensuring weekends are unchecked if desired.
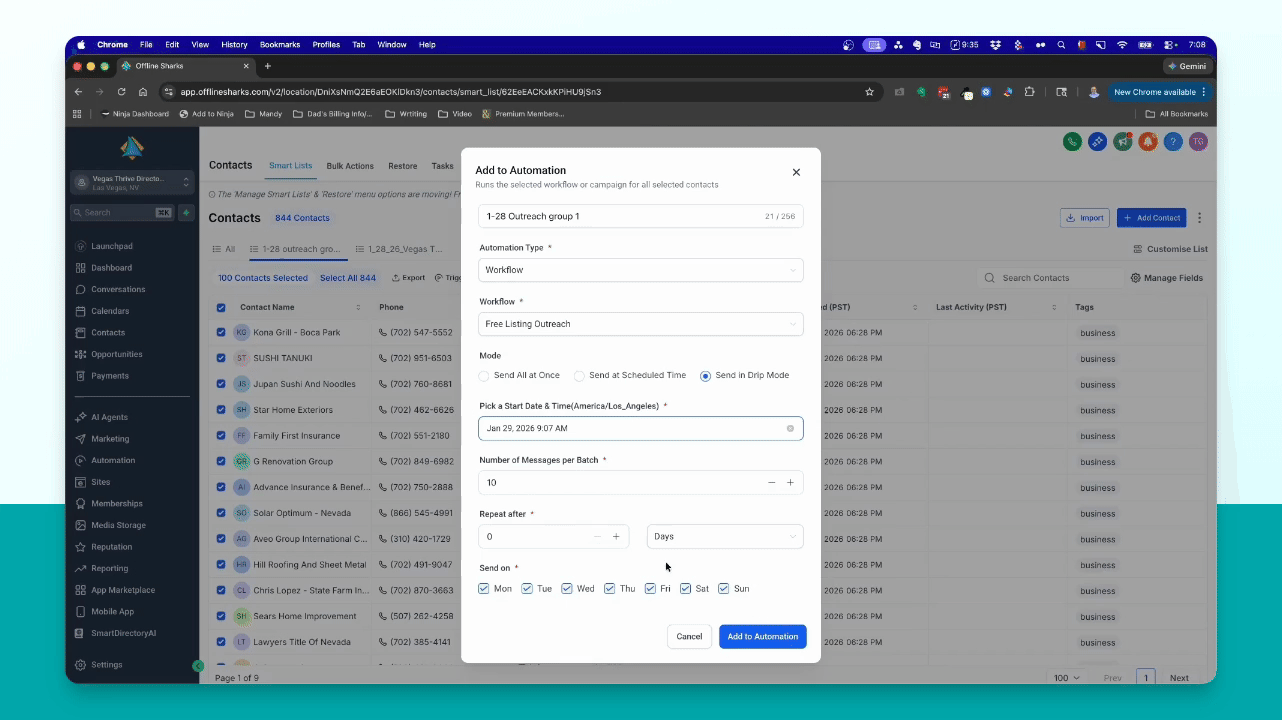
Step 16: Finalize Automation
Click Add to Automation to schedule the outreach for the designated time.