
Connect Stripe
Click on Settings in the dashboard and go to Integrations.
Click Connect and follow the prompts to connect or create your Stripe account.
Edit Existing Plans
Aloha, Tom here. In this video, I'm going to show you how to set up your plans and pricing for your premium listing offers. Let's look at the steps:
Go to the dashboard of Smart Directory AI by clicking on it in the lower left corner. Then navigate to the plans page in the dashboard.
To edit an existing plan, click the pencil icon next to the plan you want to modify. You can update the plan name and description as needed.
Select your currency and click next. Choose the information you want to include for your free listing, such as address, phone, and website.
You can change the order of the included features by clicking the arrows. Toggle the features on or off as desired.
Since this is a free plan, click submit without additional charges. Your plan will now show green check marks for included features on the front end of the site.
Edit Premium Plan
In this tutorial, we will discuss how to edit an existing premium plan and also how to add new premium plans. Let's look at the steps:
Step 1: Edit Premium Plan
Edit the existing premium plan by clicking the pencil icon. Here, you can set the plan name, description, currency, and monthly or annual prices.
Step 2: Set Payment Options
Toggle the button to enable Stripe for payments. If not using Stripe, create custom payment links for both monthly and yearly options.
Step 3: Finalize Plan Settings
Turn on the features you want available in the plan, and click Submit to update your plan.
How to Create Plans
Step 1: Create Yearly Only Plan
If you want a plan that charges only yearly, copy the details of your existing plan, delete it, and create a new plan with just an annual price.

Step 2: Review Changes
Refresh the page to see the updated plans, ensuring you have a free plan and only the new annual plan visible.
That's how you can effectively edit and manage your premium plans, including adding custom items and setting payment options.

External Checkout/Custom Payment Link - Use SmartDirectoryAI Without Stripe
Yes! You can use SmartDirectoryAI without Stripe, thanks to our new External Checkout Support feature. This lets you connect your Premium Plans to any external checkout provider (PayPal, ThriveCart, SamCart, WooCommerce, etc.).
Step 1: Go to Your Premium Plans
Log into your SmartDirectoryAI dashboard.
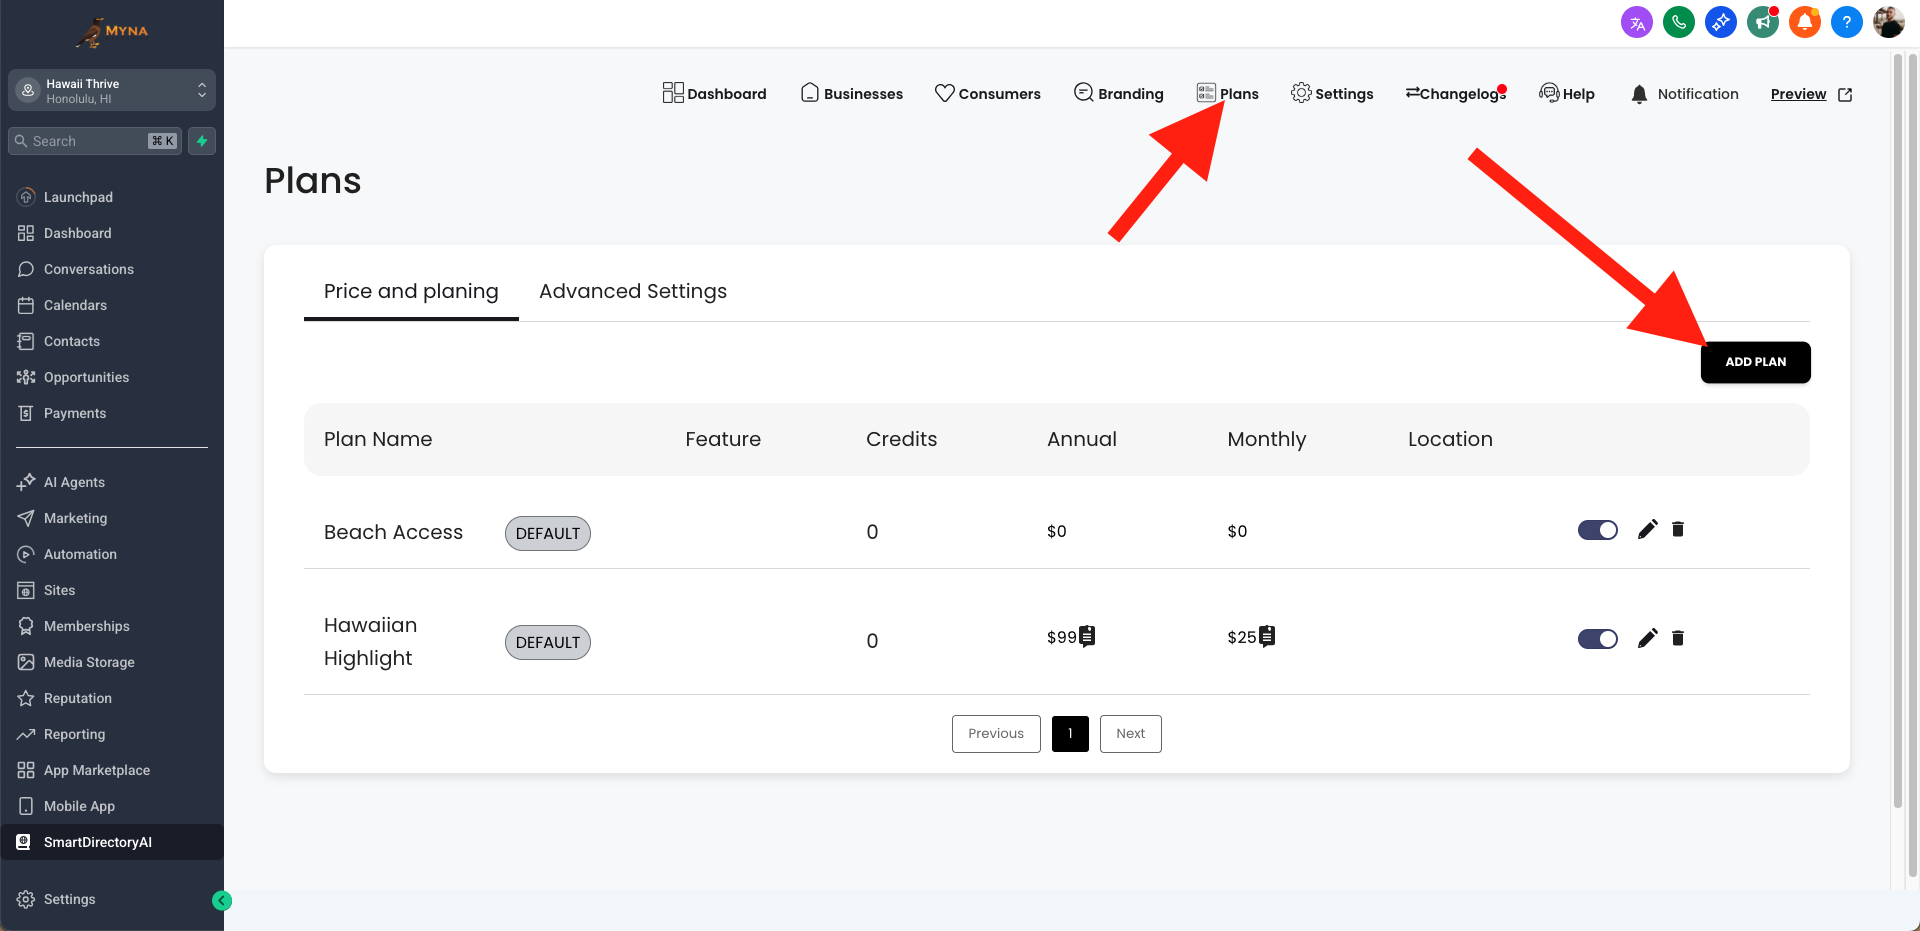
From the top menu, click Plans.
Click Add Plan to create a new plan.
Step 2: Add Your External Checkout Links
In the plan settings, you’ll see two new fields:
Monthly Checkout Link
Annual Checkout Link
Paste in the URLs from your external checkout provider.
Example: PayPal subscription link, ThriveCart product page, WooCommerce checkout link, etc.
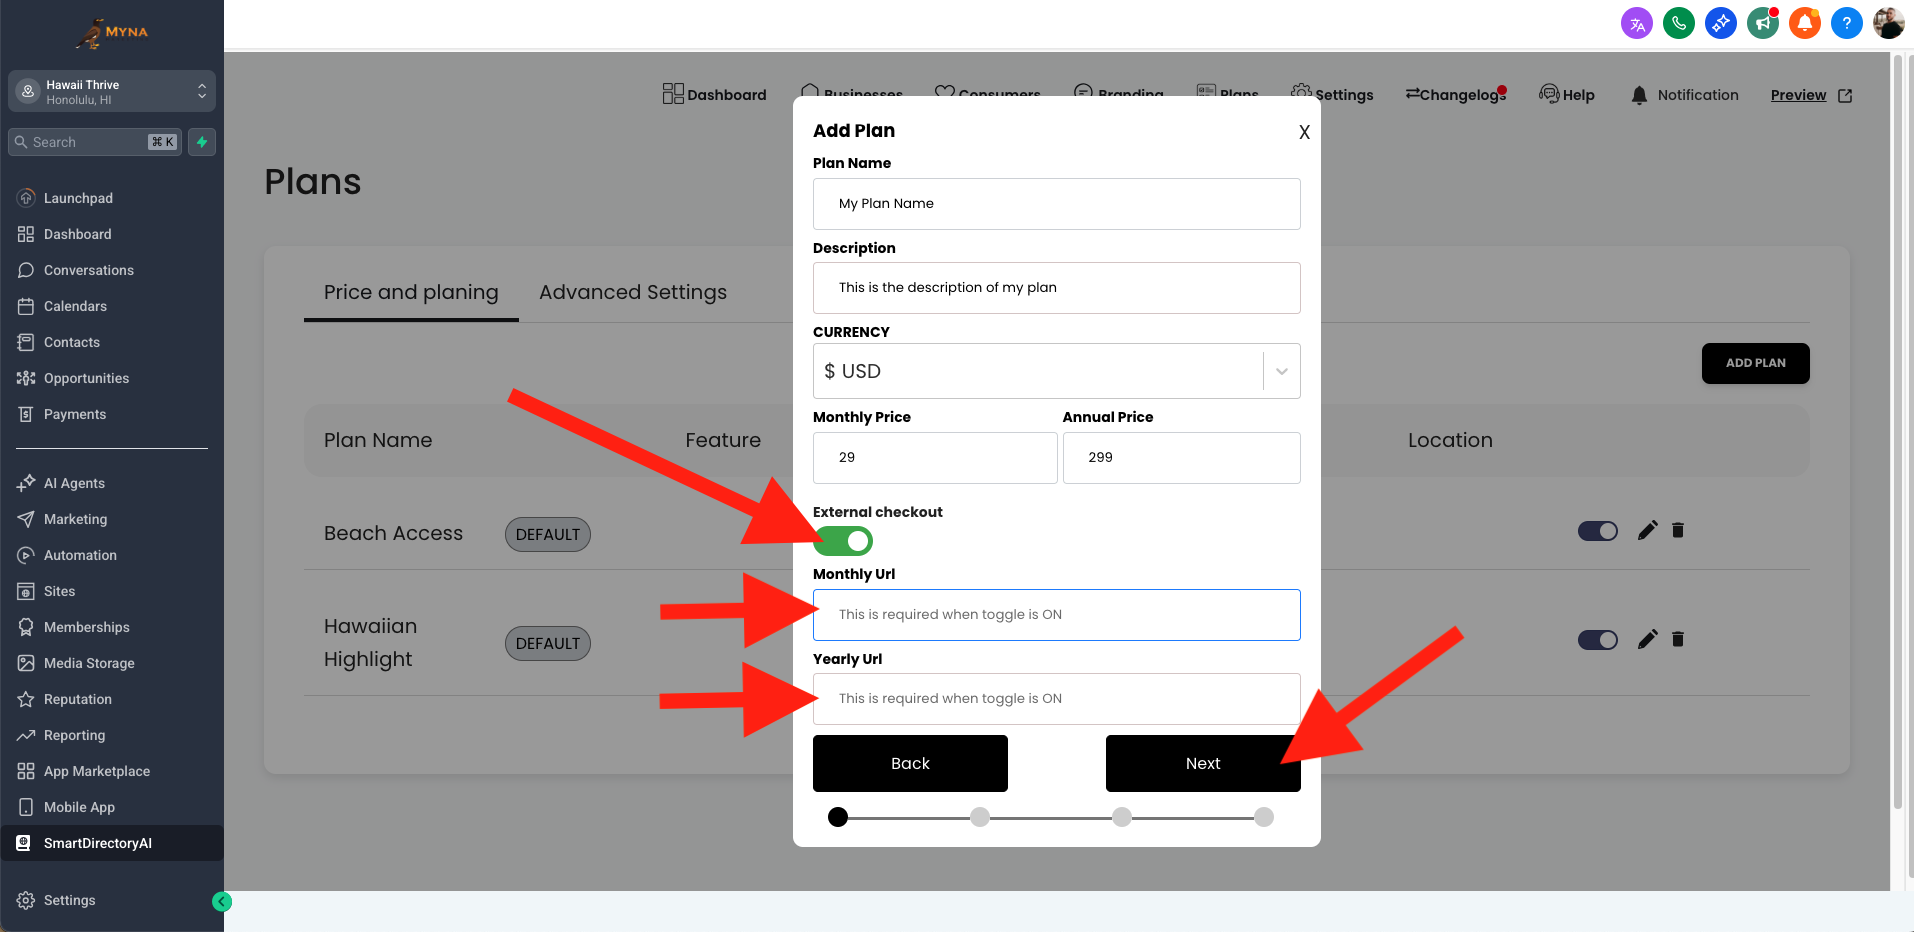
Step 3: Save and Publish
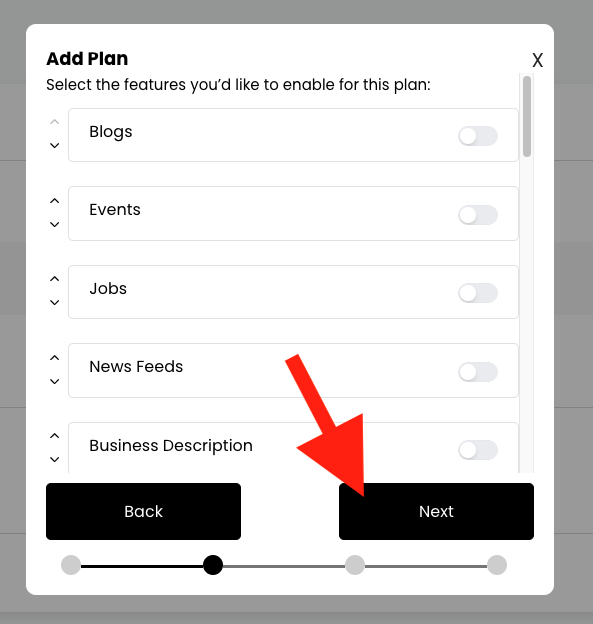
Click Next, and select your plan options.
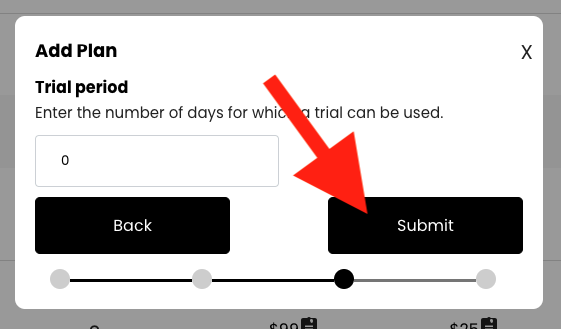
Then click Next again, and enter a trial period if you'd like one.
Then click Submit.
Your Premium Plan is now live with external checkout!
When customers upgrade, they’ll be taken directly to the external checkout page you linked.
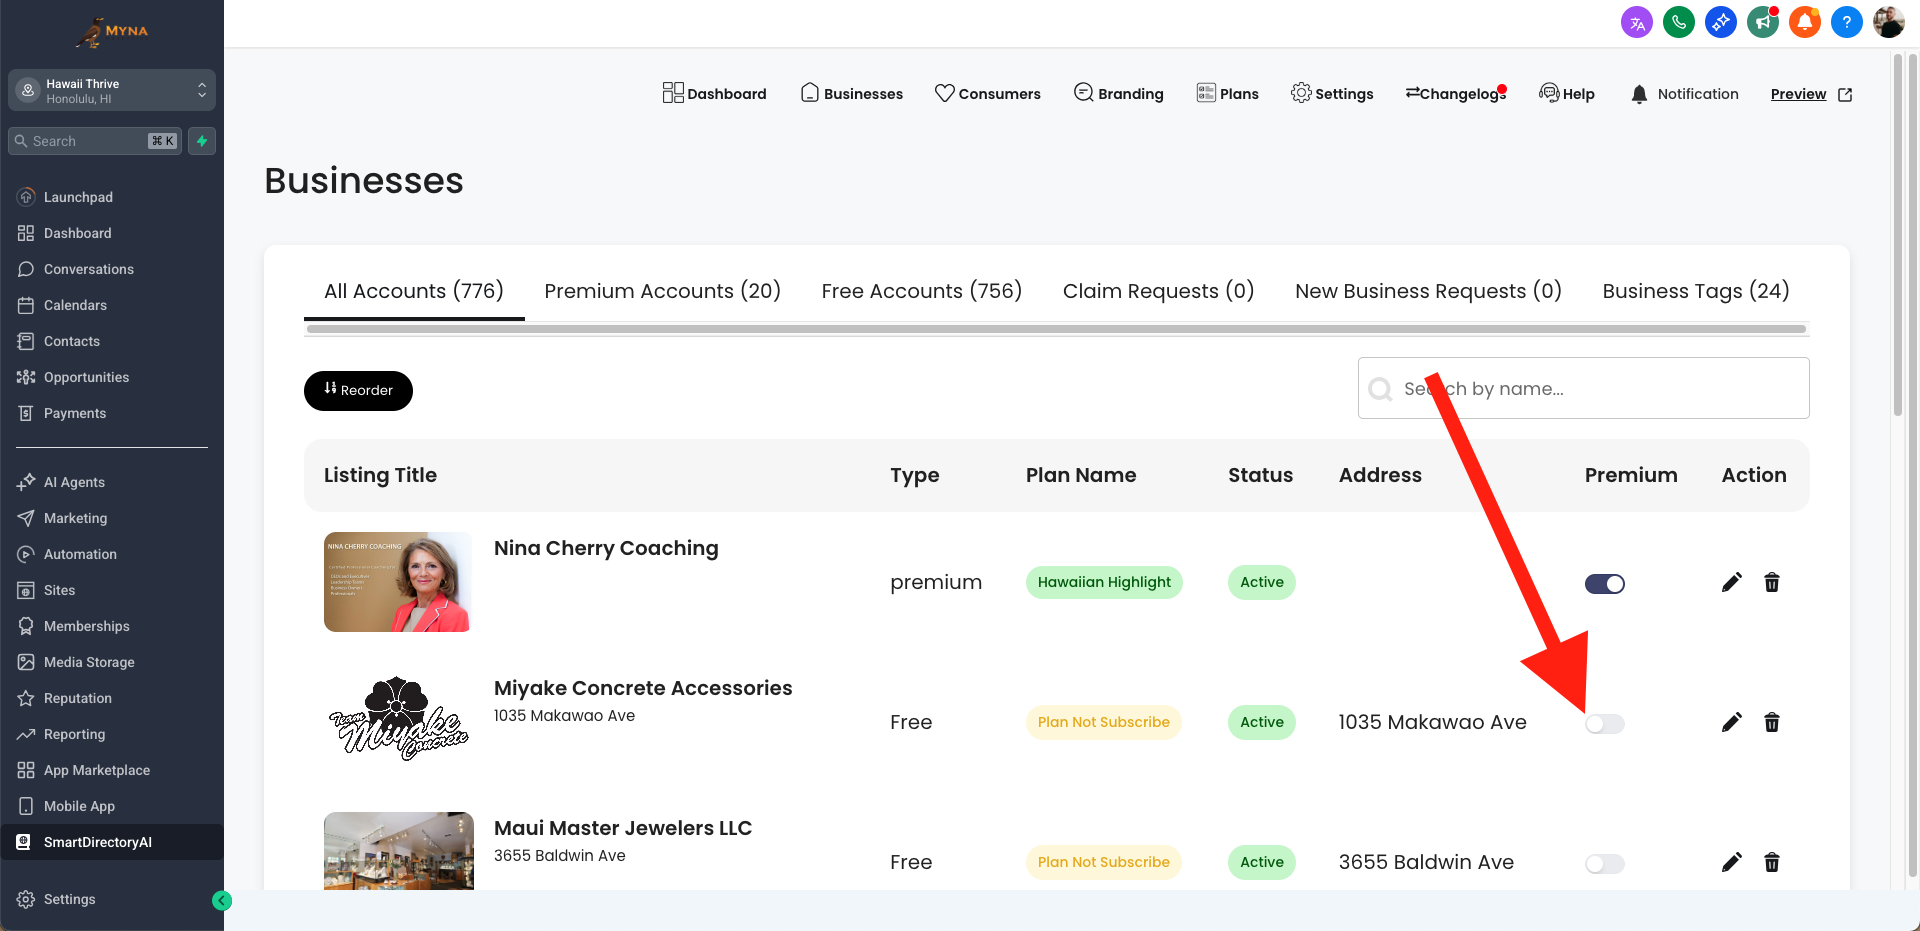
Step 4: Manually Upgrade Listings After Purchase
Because external checkouts are not connected to SmartDirectoryAI, payments won’t automatically trigger upgrades or workflows.
After someone pays externally, you’ll need to:
Go to Businesses in your dashboard.
Find the customer’s listing.
Change their plan to Premium by using the slider next to the name of their listing.
(Optional) Add their contact manually to the “Listing Upgraded to Premium” workflow if you want them to receive your automation emails/texts.
When Should You Use External Checkout?
If you don’t have (or don’t want) a Stripe account
If you already use another checkout system and want to keep all payments there
If you’re testing different providers for your business
Summary
👉 You do not need Stripe to run a SmartDirectoryAI directory with Premium Plans.
👉 Just use External Checkout Support to connect your existing payment provider.
👉 Remember: upgrades and workflows will need to be applied manually after purchase.
Setting a Custom Redirect After Purchase
Coming soon
Advanced Settings - Add Custom Plan Items
Step 1: Add Custom Items
To add custom items, go to Advanced Settings and click Add New Add On. Enter the name and value, then click Add.

Step 2: Enable Custom Items
Edit your paid plan and enable the custom items added. Click Submit to save changes.
Resources
Watch "Premium Listings to Premium Clients"
Get Your "Premium Listings to Premium Clients" PDF Guide
AI Strategies That Actually Turn Leads Into Dollars (Lots and Lots Of Them)